Medical Triage · 1.0
Medical Guide — Triage Order for Injuries & Vitals
How to prioritize bleeding, infection, heart rhythm, and fractures in Casualties: Unknown using the health panel and official survival mechanics.
What should you treat first in Casualties: Unknown?
Stop life-threatening blood loss and check consciousness before everything else. The official Steam page states you must bandage yourself and stabilize blood loss before you lose consciousness, on top of a full limb and cardiovascular simulation. When multiple problems appear on the health panel at once, use a simple triage order: bleeding and vitals first, infection next, then bones and mobility.
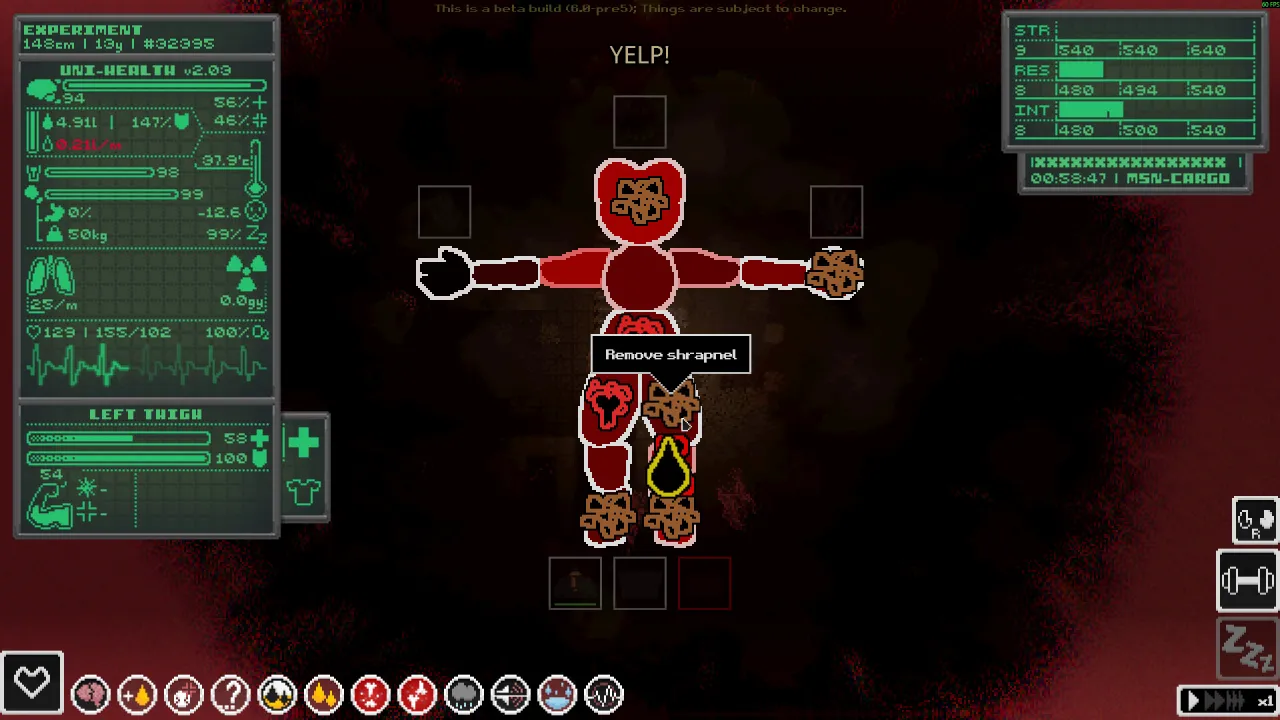
How does the health panel organize medical problems?
Official trailer and store imagery show a body diagram with color-coded limbs, a vitals block (heart rhythm, pressure, oxygen), and per-limb detail when you select an area. Community references checked on 2026-11-10 describe separate meters for bleeding rate, infection, fibrillation progress, and bone injuries; those details are community-reported and may shift between builds. For this wiki, treat the panel as four lanes you can scan in seconds:
| Lane | What you are looking for | Dedicated guide |
|---|---|---|
| Circulation | Bleeding totals, blood volume, pressure warnings | Bleeding |
| Heart rhythm | Irregular ECG, fibrillation moodles | Fibrillation |
| Wound hygiene | Infection icons, spreading discoloration | Infection |
| Structure | Fracture or dislocation timers, splint hints | Broken bones |
Mood and resilience also matter at the survival layer: the store page notes that too much doom and gloom makes life harder, which pairs with the Intelligence, Strength, and Resilience traits listed in the same feature block.
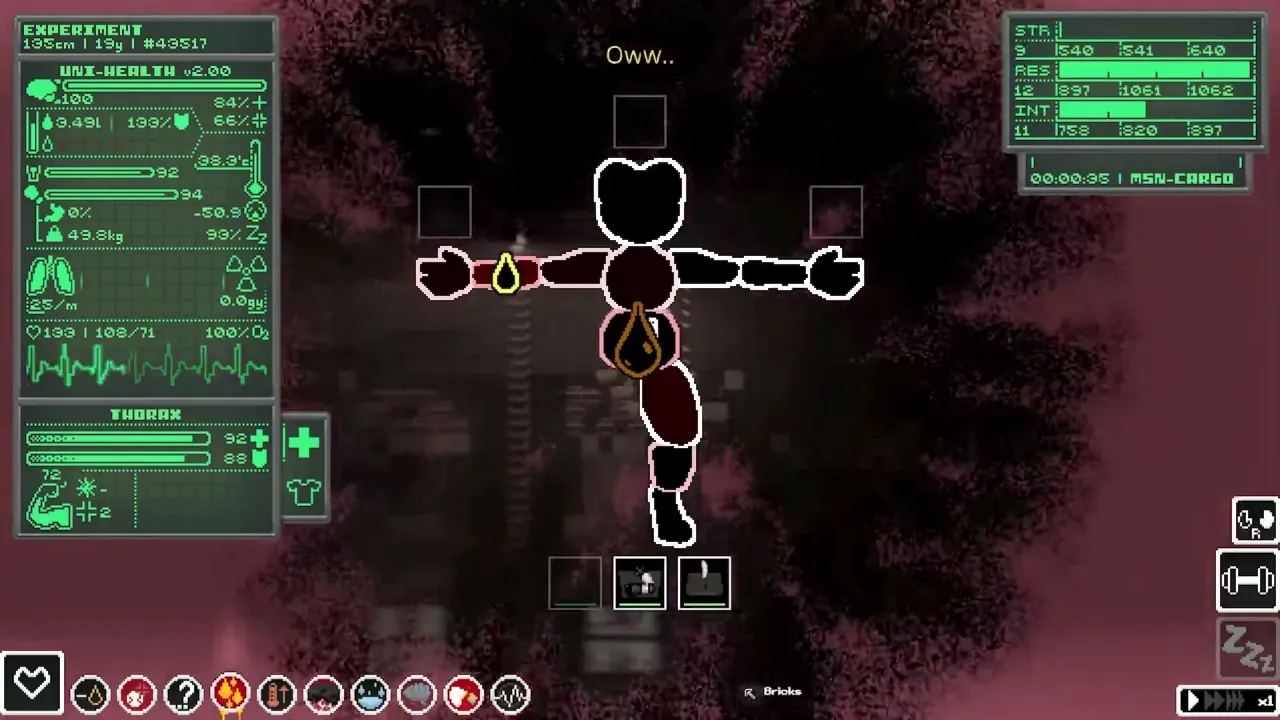
What is the recommended triage sequence during a run?
Use this “see → stabilize → buy time → recover” flow when you are mid-layer and cannot craft peacefully in a menu:
- Bleeding — Open the bleeding guide workflow: identify which limbs are actively losing blood, bandage or seal them, and remove embedded debris if the UI offers shrapnel removal. Untreated bleeding is the fastest route to unconsciousness named on the store page.
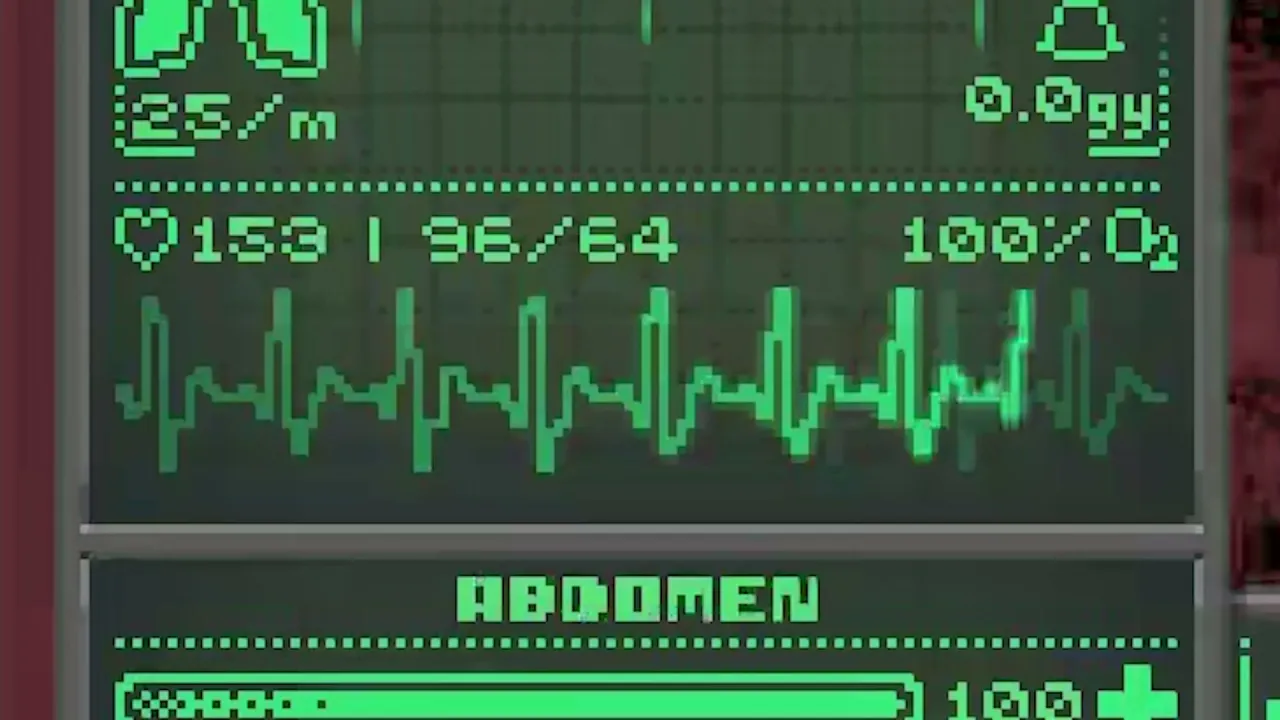
- Heart and oxygen — If the vitals monitor shows a chaotic ECG or you trigger arrhythmia moodles, switch to fibrillation priorities before you chase optional loot. Community-reported data ties very low blood pressure and extreme heart rates to fibrillation risk; cross-check in your own health panel rather than memorizing numbers here.
- Infection — Once circulation is stable, address infection on any limb with broken skin. The store page explicitly mentions fighting infected wounds; disinfection and crafted sterile dressings are the long-game answer, not ignoring a limb because bleeding stopped.
- Bones and movement — Broken bones and dislocations rarely kill as fast as bleeding, but they cap muscle function and spike pain. Splint, rest, or set joints when you are safe, not while enemies are still attacking.
If you are completely new to the cave loop, pair this order with the beginner guide and the how many layers overview so you know when to turn back versus push deeper.
Which systems outside the health panel feed medical outcomes?
Medical outcomes are not isolated to one menu:
- Crafting — Sterile dressings, splints, injectors, and defibrillator gear come from the crafting loop (crafting recipes). Demo-era trailer frames show a Sterilized dressing recipe with ingredient lists; treat exact costs as community-reported unless you confirm them in your build.
- Exploration depth — Each of the 11 layers escalates hazards. Layer guides such as Gravel Lands help you predict trap and creature damage types before you pack medical supplies.
- Economy and loot — Trader windows and radial inventory wheels appear in official media; medical injectors are high-value salvage when found, but relying on them without bandages is risky.
When should you retreat instead of pushing deeper?
Retreat when two lanes on the triage table are red at once—for example heavy bleeding plus arrhythmia, or infection spreading on a limb you still need for climbing. The simulation is deliberately unforgiving: the store description frames you as one of thousands of expendable subjects, so banking progress in a safer pocket and re-entering with crafted stocks is valid strategy.
For platform setup before long sessions, see system requirements. For story outcomes after brutal runs, the endings guide stays separate from triage but helps you decide risk tolerance.
Sources checked
- https://store.steampowered.com/app/4576490/Casualties_Unknown/ (features, mature content notice, demo mention)
- https://casualtiesunknown.miraheze.org/wiki/Blood_(mechanic) (bleeding categories — community-reported detail)
- https://casualtiesunknown.miraheze.org/wiki/Infection (infection overview — community-reported detail)
- https://casualtiesunknown.miraheze.org/wiki/Heart (fibrillation overview — community-reported detail)
- https://casualtiesunknown.miraheze.org/wiki/Bone_Injuries (fractures — community-reported detail)
Last checked 2026-11-10 against the sources above, game version 1.0.
Screenshots and trailer frames: official Steam store page and trailers, © Orsoniks / Oro Interactive.
FAQ
Does Casualties: Unknown have a dedicated medical system?
Where do I see injuries in the UI?
Can plants help with first aid?
How many cave layers affect medical pressure?
Is there a demo with limited medical practice?
Related Articles
guides
Casualties: Unknown Beginner Guide — Walkthrough & Controls
First-run priorities for Casualties: Unknown: tutorial, survival order, default controls from in-game training, and common mistakes to avoid.
guides
Console Commands — Sandbox, Cheats & How to Open the Console
Open the developer console with the backtick key, use the Training Sandbox, and see which commands are corroborated on two sources—type help for the live list.
guides
All Endings in Casualties: Unknown — Bio-pod, Escape, Mercenary
Casualties: Unknown has three endings on a full run: Bio-pod, Escape, and Mercenary. How they branch after layer 10 cargo and layer 11 ascent.
Was this helpful?
Thanks for the feedback!